Now that we’ve gone through the basics of the user interface in SketchUp (check out Part 1 and Part 2 of our SketchUp UI tutorials here), let’s start learning how to use some of the two dimensional tools. Go ahead and open up a new model.
Let’s start with the eraser tool to erase Sophie. Click on the little pink eraser icon on your toolbar (you can also access this tool by pressing the “e” key.)

After you’ve done this, your cursor will turn into a little eraser icon. Using your cursor, click on one of the lines making up Sophie’s model, and she should disappear.

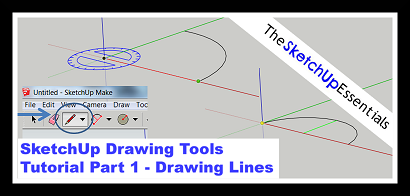
This will leave us with an empty workspace. Now, we’re going to start learning how to use SketchUp’s 2D tools. Let’s start with the little pencil icon in your toolbar.

Click on the pencil, and your cursor should turn into a pencil icon (keyboard shortcut for this tool is the “l” key). Now click once on the screen. This will set the first point of your line. Now click somewhere else on the screen. As you can see, this draws a line between the two points you just clicked.

If you notice, the line tool remains active after you set your second point. This allows you to set multiple lines at once. However, we only want to create one line right now, so go ahead and press the “escape” key to close the line you’ve created. In addition to the method we just talked about, you can also set a line by clicking and dragging (click once and hold the mouse down until you have moved the cursor wherever you would like the line to go). As mentioned at the end of our SketchUp user interface tutorial, you can set the length of your line by typing dimensions into the measurements box at the bottom of the screen as well.
I want to go ahead and use the line tool to demonstrate how the axes and inferences work in SketchUp. Go ahead and place the first point of a line in your drawing area. Now drag your mouse around – if you notice, when you draw a line in certain directions, it changes different colors. For example, if I place a point, then draw a line in a direction that is in line with one of the axes, my line will turn green.

This is SketchUp showing you where your line should go to stay parallel with one of the axes. This is called an inference – basically, it means that SketchUp tries to help you by guessing where you would like your line to go. If you are trying to draw a line on the green axis, you can “lock” the inference by holding the “shift” key. This will force SketchUp to draw your line only on the green axis, meaning all you have to worry about is your line length, not your direction.
You can also force SketchUp to draw a line along a certain axis using your arrow keys. Once you set your first point, you can force SketchUp to draw along the green axis using your left arrow key, the red axis using your right arrow key, or the blue axis using your up arrow key. This will save you a lot of time in the future, so get in the habit of using it now!
Now that we’ve talked a little bit about inferences, let’s get back to our 2D drawing tools. If you notice, several of the 2D shape icons have little down arrows next to them. This will allow us to access other 2D drawing tools. Click the down arrow next to the line key, and you’ll see an icon that looks like a squiggly line. Click on this object to activate the freehand tool.

The freehand tool allows you to create irregular lines. To use this tool, click and hold down your mouse button, then drag your cursor around the screen to draw. Quite honestly, I’ve never really found much of a use for this tool, but it’s there if you need it.
Arcs
This next set of tools is used to create curved lines. The first one is the two point arc tool. You can activate this tool by clicking on the half circle icon, or using the keyboard shortcut “a”.

This tool creates arcs (or curved lines) by allowing you to place two points and set a bulge distance. Click twice to draw a line in the drawing area. Click a third time to set how much the line curves between those two points. You can specify how much you want the curve to bulge with the measurements bar as well by typing in a dimension.

If you click the drop down on the menu, there are two more arc creation tools. The first one is simply called the arc tool.

Instead of setting the two ends of an arc first like the 2 point arc tool, this tool allows you to create an arc starting with the center point, then by setting the two end points. When you activate this tool, notice your cursor turns into a protractor. This happens in SketchUp when you are working with angles.
Click once to set the center point of your arc. Click again to set the first point of your arc. As you move your mouse around after you’ve set this first point, notice that the line is drawn based on a number of degrees (look down at the measurements bar). You can type the number of degrees that you would like the radius of your arc to be if you’re looking to draw a precise arc.

The final tool in the arcs toolbar is similar to the arc tool. It’s called the pie tool. This tool works exactly like the arc tool, except that it draws a closed arc with a face. We’ll get into faces more in the next tutorial, but basically, this tool will draw two extra lines from the center of your arc to the two endpoints of your arc to create a fully enclosed object shaped kind of like a pie slice. See the image below for an example of what this tool creates.

This concludes Part 1 of my SketchUp 2D drawing tools tutorial. You can access part 2, “Faces in SketchUp” by clicking here.
For more SketchUp tutorials and lessons, click here.
About Justin Geis
Hi, I'm Justin Geis, and I'm the founder of The SketchUp Essentials. I started using SketchUp as part of my work as a general contractor in 2008. I quickly realized the power of the software and started using it for personal projects. I started The SketchUp Essentials as a place to share easy to follow SketchUp tutorials and tips to help everyone harness the power of 3D Modeling in their lives. When not working with SketchUp, I enjoy playing soccer and spending time with my wife and our two dogs.

