
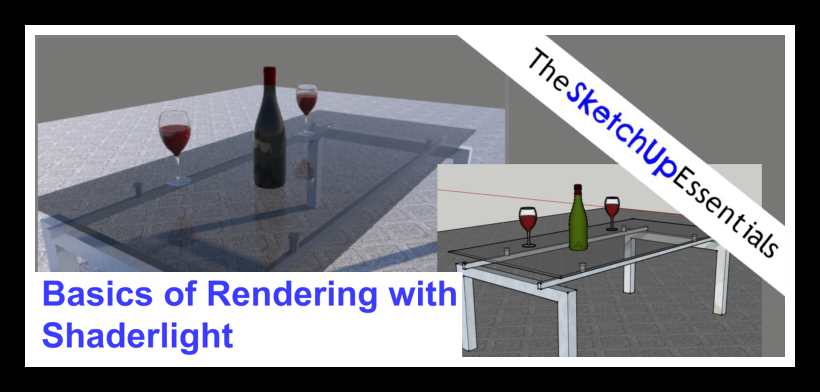
Rendering your SketchUp Model in Shaderlight
Video Part 1 – Basics of Shaderlight
Video Part 2 – Sample Shaderlight Rendering Tutorial
One of the things that I want to do with the SketchUp Essentials is review and talk about different third party plugins that can make SketchUp more powerful.
In this post, I want to talk about a photorealistic rendering plugin. Rendering is using a computer program to create a realistic image of a 3D model. There are many rendering programs for SketchUp, such as Lumion, Twilight Render, V-Ray, and Shaderlight (as well as many more). Some of these can be downloaded for free, and some of them have to be purchased. Basically, the way these programs work is by applying realistic materials to your 3D objects, then applying lighting to their materials to make them look realistic. I hope to do a post about each of these programs in the future.

Right now, Shaderlight (one of the rendering softwares mentioned above) is holding a 3D rendering contest. They are requesting that entries be emailed to them, then these entries will be uploaded to their facebook page. The most popular rendering on their facebook page will be the winner. The deadline for entries into this contest is October 31st, so I figured now might be a good time to do a quick tutorial on using Shaderlight to create photorealistic renderings. I do want to note, I do not consider myself an expert on creating renderings, but I’ve worked with them enough to be able to walk you through some of the basics.
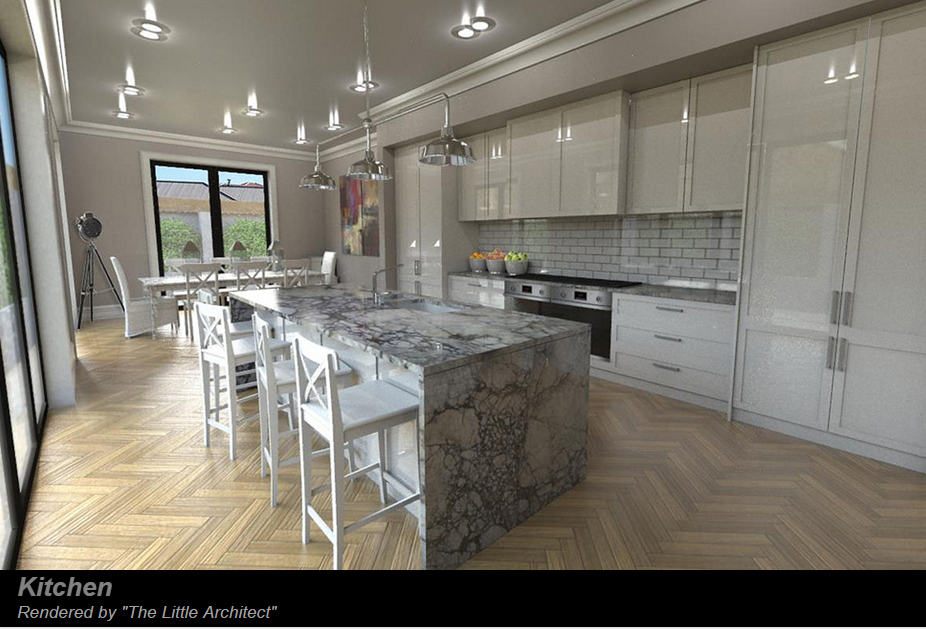
Here are a couple images from Shaderlight’s website to give you an idea of what can be done by experts in photorealistic rendering.


To start off, Shaderlight is a paid rendering program. Their full license is $299. However, if you just want to participate in their contest, you can download a 14 day trial of their software here (https://www.artvps.com/index.php/catalog/shaderlight). After your 14 days are up, you can still use Shaderlight for free, but some of the features are restricted (I believe you are limited in the size of image you can create and some of the tools aren’t active).
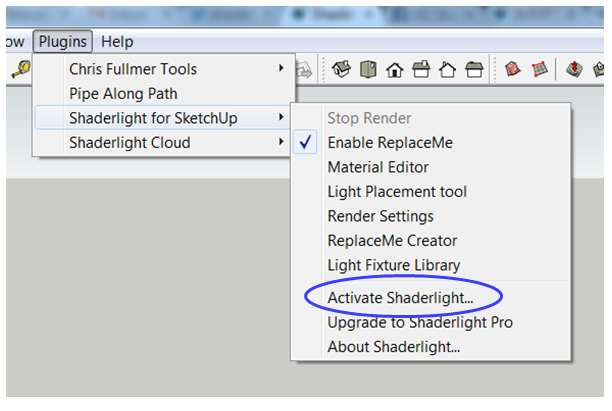
Once you download the 14 day trial and run the installation file, Shaderlight should automatically show up in SketchUp. You’ll have to activate your 14 day trial to get access to all their features. To do this, go to the plugins toolbar, go down to the option labeled “Activate Shaderlight,” and then enter the code that was emailed to you.
This will activate your 14 day trial. Now you can start using Shaderlight! There is one more thing you should do to get started. You need to make sure that the Shaderlight toolbar is showing up on your screen. Look around for a toolbar that looks like the image below.

I’ll give you a quick run-through of what each one of these icons means, but in general, just know that most rendering softwares contain variations of the following tools – a render button to start your rendering, a material menu for modifying the properties of your materials, a lighting menu to set up your lighting, and a settings button to handle general settings like processing levels, resolution, etc.
The first button on the toolbar is an icon that looks like a camera. This is the start Shaderlight rendering button. This button will open up a new window and start rendering your current view.

Let’s say I had a simple image of a wood box, like the image below.
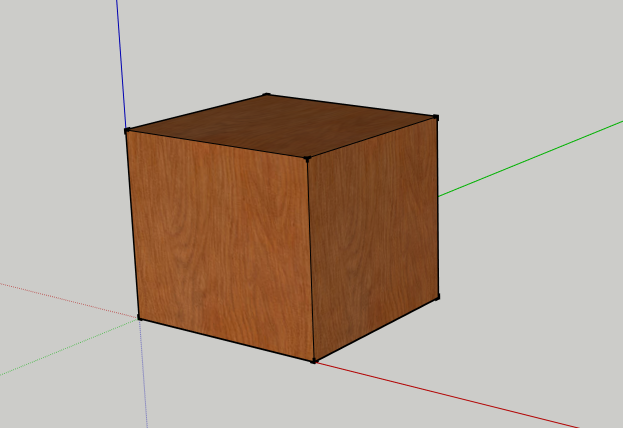
If I click once on the start rendering button, here is the window that would pop up –
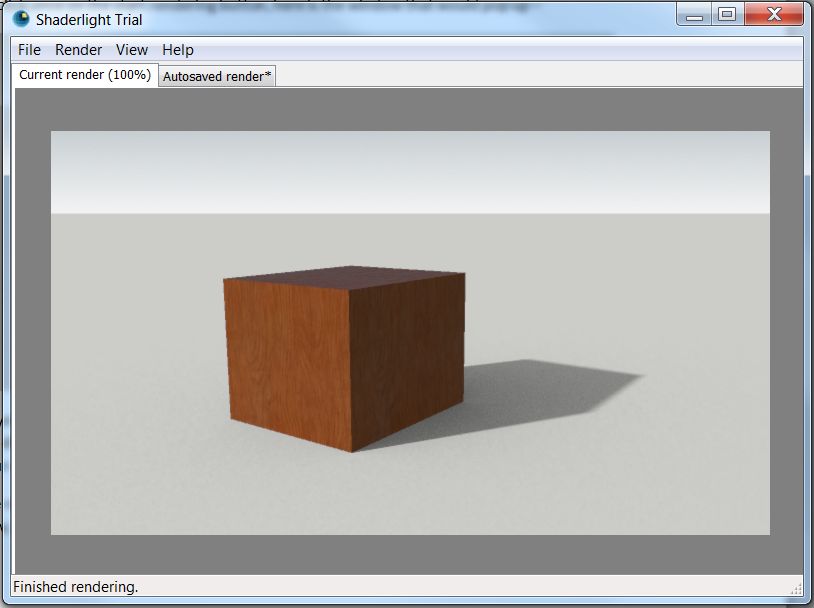
As you can see, Shaderlight renders my box to show what it would look like under more realistic lighting conditions. In addition, if you have shadows enabled in SketchUp, your object will cast a shadow on the ground as if the sun was shining on it. You’ll notice that your image starts off looking a little fuzzy, then more definition comes in as your computer completes the rendering process. This is because rendering is a very processor intensive process, so your computer is working on creating a more detailed image, but in the meantime it shows a less detailed image while it works.
The next button is the render animation button. I’m not going to talk too much about this button right now, but you can use it to create realistic animations in your model.

Remember, when you create a rendered animation, your computer basically has to render hundreds of realistic images to make up the frames in your video, so this can be a very time consuming and processor intensive process.
The next button looks like a shiny sphere. This is the material editor.

If you click this button, you’ll bring up a menu like the one shown below.
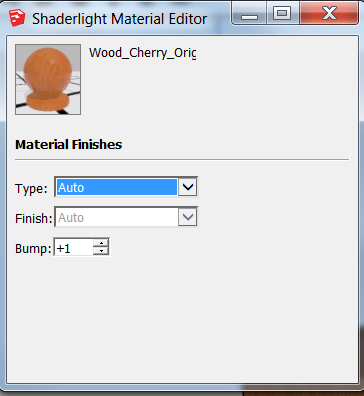
The material editor is used to apply properties to different materials. When you start off with basic materials in SketchUp, they don’t necessarily come with the information needed to render them properly. For example, right now, my box just has the base Cherry Wood finish that comes as part of a stock installation in SketchUp. The material editor allows us to select settings specific to rendering to make materials more realistic.
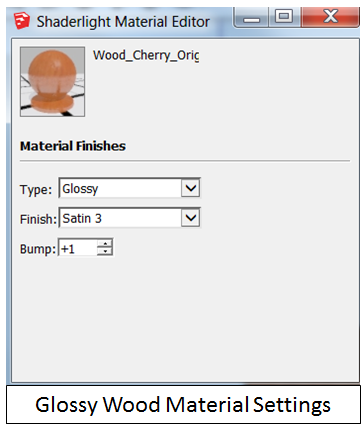
For example, let’s say that this wood box is made of a wood material with a heavy gloss on it. This would change the way my material looks under light because it would be more shiny. I can go in and change my type of material to glossy, and my finish to one of the satin settings. This would make my material more reflective of the light, and would change the way it looks when rendered. If you look at the little image up in the upper left hand corner of the material editor, it shows a preview of what the material will look like when rendered.
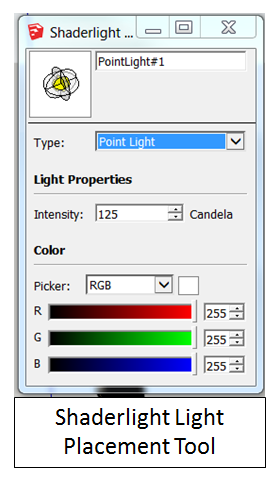
The next icon in the toolbar is the lighting icon. This icon allows you to create different lighting conditions.

SketchUp comes with its own lighting engine. It creates light using a “sun” in the sky that you can set to different levels. However, sometimes when you work with renderings (especially when doing interior renderings) you want to create your own light sources, and this tool allows you to do that. There are several different kinds of lights you can create based on the type of condition you’d like to create (point lights, spotlights, etc).
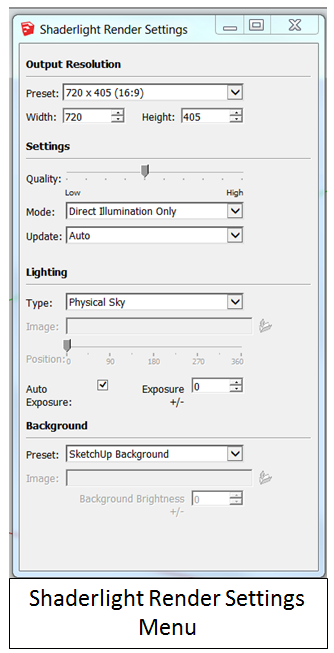
The next icon is the render settings menu.

This is the place where you can set things like the resolution of the images you create, the level of detail that you would like the render tool to include, the lighting type in the model, and the background.
The last option on the Shaderlight toolbar is the Shaderlight cloud option.

Sometimes when you’re rendering complex scenes, if you try to render them on your computer, it can take an immense amount of time for rendering to complete because of the processing power required. What Shaderlight Cloud does is render your option for you off site with high powered computers, dramatically decreasing the amount of time required for your images to render. There is an additional charge for using this service, but if you need an image rendered faster than your computer will allow, this cost can be worth it.
So now that I’ve talked about the basics of Shaderlight, let’s walk through a quick example of building a rendering in Shaderlight.
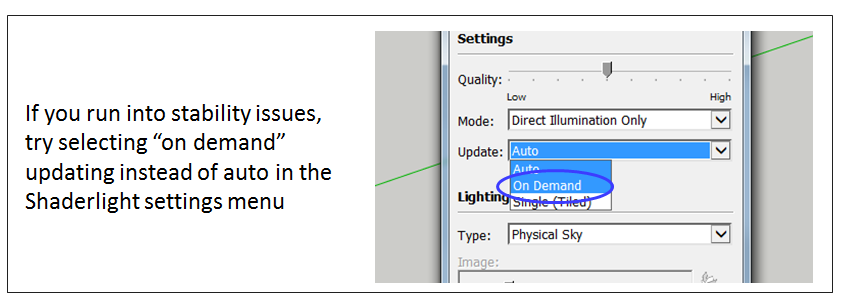
Full disclosure – I had some issues with Shaderlight’s automatic updating while I was working on this tutorial. For some reason, it would crash if I created a rendering, then tried to change any of my render settings while automatic updating was enabled. However, if I went into the settings menu and disabled automatic updating, everything worked perfectly. Shaderlight tech support is looking into the issue, but if you start running into issues with the software crashing, try disabling automatic updating. All this means is instead of Shaderlight dynamically updating your render as you move around in your model, you’ll have to click the “start rendering” button to create new renders.
We’ll do this completely with simple shapes and models from the 3D warehouse. Let’s start off by drawing a large box on the ground, and filling it in with one of SketchUp’s carpet textures.

Now let’s go get some furniture from the 3D warehouse. Search for and download the following models from the 3D warehouse –
Chrome & Glass Coffee Table – by “M”
Wine Bottle 750 mL Option 1 – by “3dworking”
Wine Glass – by “Nathan”
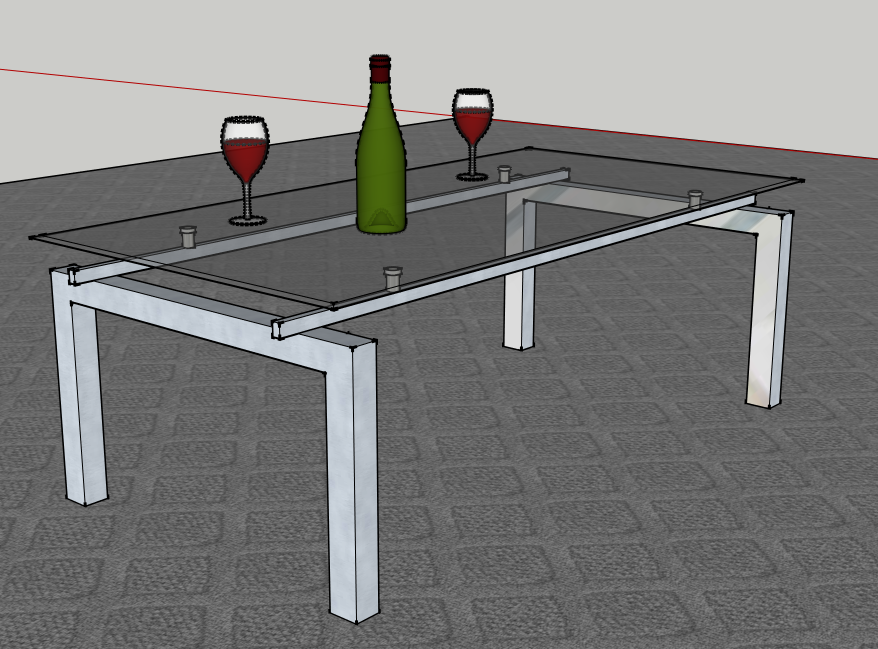
Place your models on your carpet, with the 2 copies of the wine glasses and the wine bottle on the table. You also may want to go in and re-color the legs of the table with the “Metal_Aluminum_Anodized” color.
Your model will now look like the image below.
Now, if you go up and press the “Start Rendering” button on the Shaderlight toolbar, Shaderlight will open a window and produce a rendering of your image.

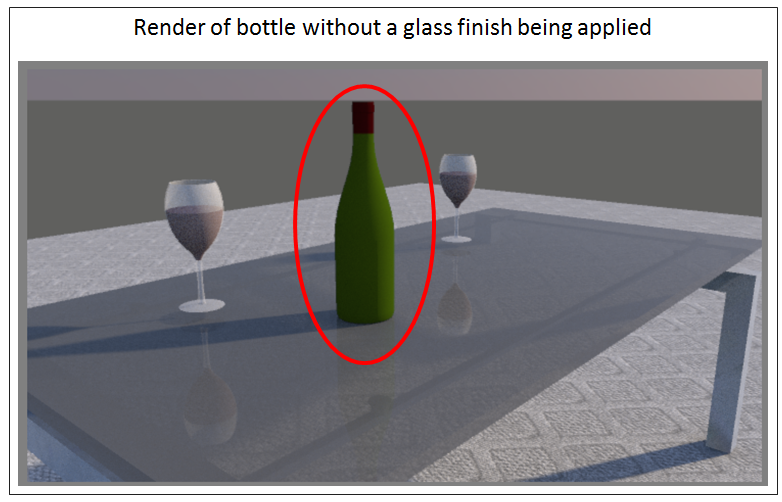
If you haven’t changed any of the settings, the image produced should look something like the image below.
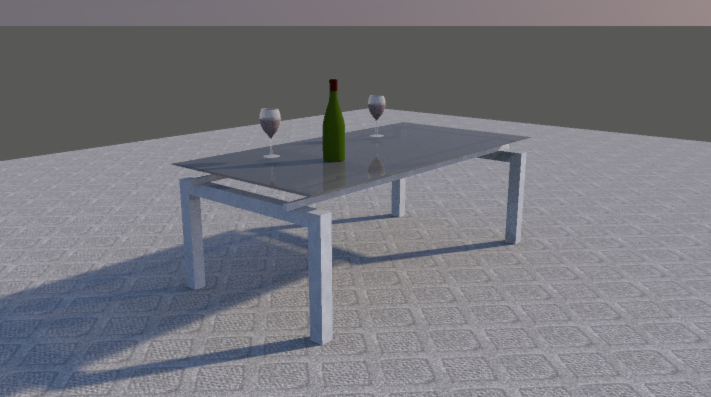
As you can see, Shaderlight creates a pretty good image with just out of the box settings. However, let’s go in and change some of our materials and see if we can make our render look even better. To edit materials in Shaderlight, you’re going to open up the SketchUp paint bucket menu as well as the Shaderlight material editor.


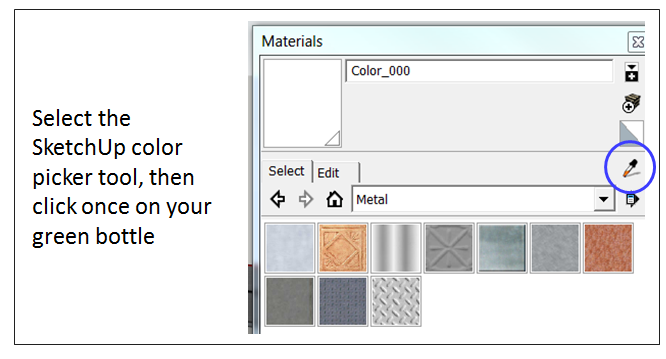
Once you have these menus open, you’re going to select the material you want to edit with the paint bucket color picker tool, then change the material settings for your render in the Shaderlight material editor. So for example, if you wanted to edit the material of the green bottle, you’d select the color picker tool of the SketchUp paint bucket menu, then click on the bottle.
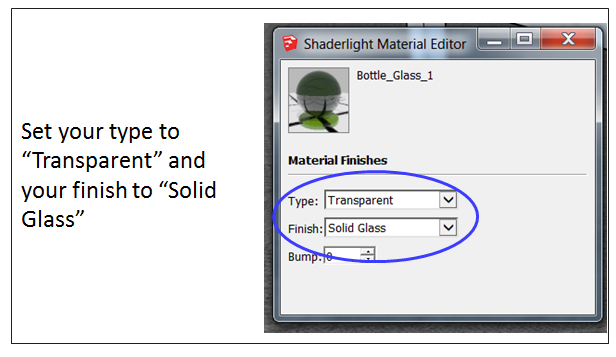
This will cause the material for the bottle to show up in the Shaderlight material editor. Now you can go in and change the settings for the bottle material in Shaderlight. In this case, this is a glass bottle, so we want to set the type to “Transparent” and the finish to “Solid Glass.”
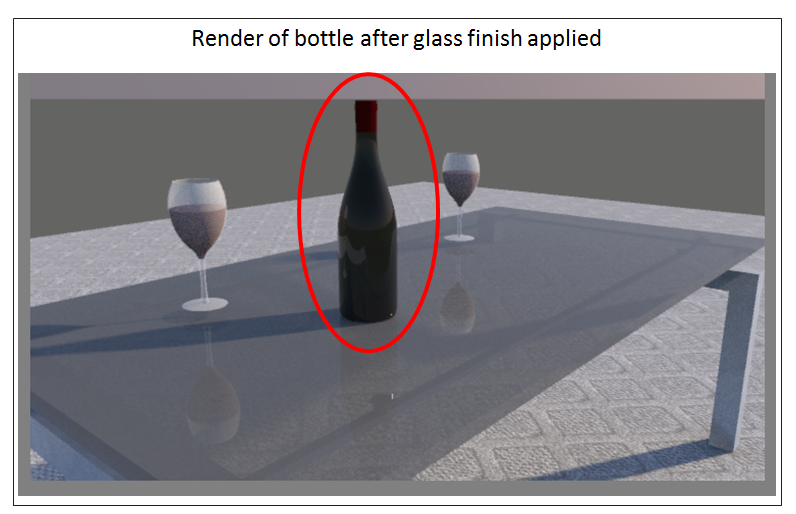
Now if you render your bottle, you’ll notice that when you use the glass settings, your bottle comes out much more realistic looking than it was with the automatic settings.
Go ahead and change some of the other materials in the model. For example, change the glass on the wine glasses to a solid glass, the table glass to a thin glass, and the wine in the wine glasses to a translucent liquid shiny finish. Then, render your image again.

As you can see, even making some basic changes to your materials in the Shaderlight material editor can make a big difference in the way your render looks.
Hopefully this tutorial got you inspired to go out and try out rendering your own models. I highly recommend checking out Shaderlight’s free 14-day trial (you can download that here), and also entering your own Shaderlight render into their competition. Just email your entry to Shaderlight directly at support@artvps.com. Remember, the last day for entries into their contest is October 31st, so make sure you get your entries sent in before that.
_________________________________________________________________________________________________________________
About Justin Geis
Hi, I'm Justin Geis, and I'm the founder of The SketchUp Essentials. I started using SketchUp as part of my work as a general contractor in 2008. I quickly realized the power of the software and started using it for personal projects. I started The SketchUp Essentials as a place to share easy to follow SketchUp tutorials and tips to help everyone harness the power of 3D Modeling in their lives. When not working with SketchUp, I enjoy playing soccer and spending time with my wife and our two dogs.
