
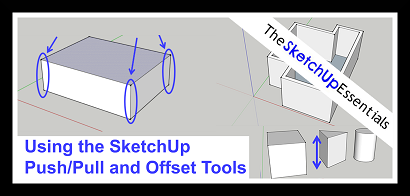
Using the Push/Pull and Offset Tools in SketchUp to Create Shapes and Floor Plans
In the past, we’ve talked a little bit about using the push/pull tool in SketchUp to build 3D shapes (check out the SketchUp Tutorioals for building a doghouse in SketchUp, basics of groups and components), but we never got into the detail that I wanted to before, so this tutorial will be a more in-depth coverage of using the push/pull tool in conjunction with the offset tool in order to extrude 3D shapes.
To start off, let’s find the push/pull tool in our getting started toolbar up above. It’s the little icon that looks like a 3D rectangle with a red arrow coming out of the top of it.
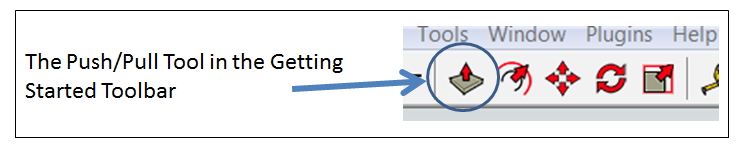
You can also activate this tool using the keyboard shortcut “p.”
In the most basic terms, the push pull tool takes a flat surface and makes it 3D by moving a face and making the object 3D. For example, let’s say I had a flat rectangle like the one below –
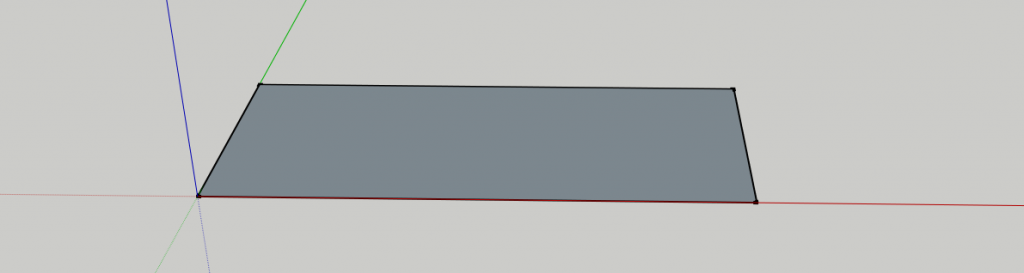
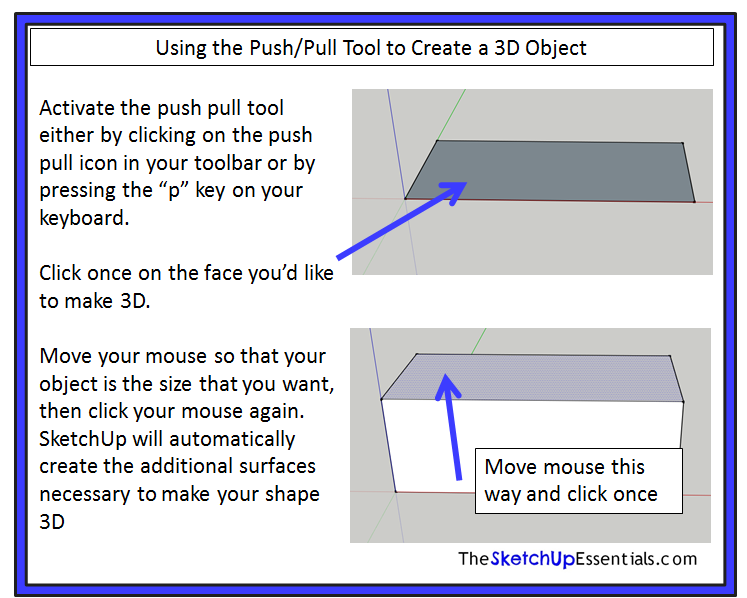
I want to take this object and create a 3D rectangular box. I’d do this by activating the push pull tool with the letter “p” on my keyboard, then clicking once on the face that I want to push or pull, then moving my mouse and clicking again at the thickness I want my box to be.
Note that this will work with any kind of flat surface in SketchUp. SketchUp will not allow you to push and pull faces that are curved.
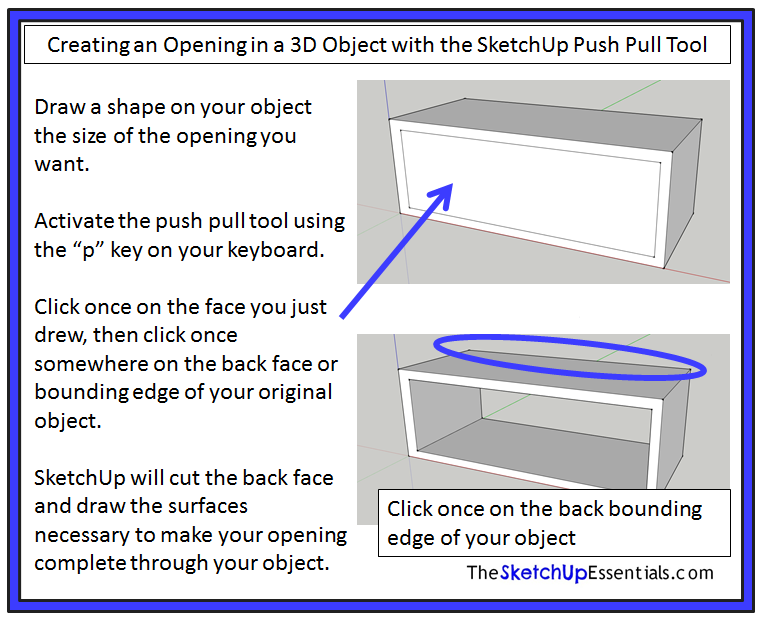
So not only will SketchUp allow you to use the push pull tool to create 3D shapes, it will also allow you to subtract from 3D shapes as well. Let’s say that we wanted to add some kind of rectangular opening to our rectangle above. What we would do is draw a rectangle on the front face of our object the size of the opening that we want, then activate the push pull tool. We’d then push our new face from the front of our object to the back of our object. It’s important that we push our face exactly level with the back face of our object to work. When we push this face to the back of our model, SketchUp automatically cuts a hole in the back face so that we now have an opening that goes all the way through our original rectangle.
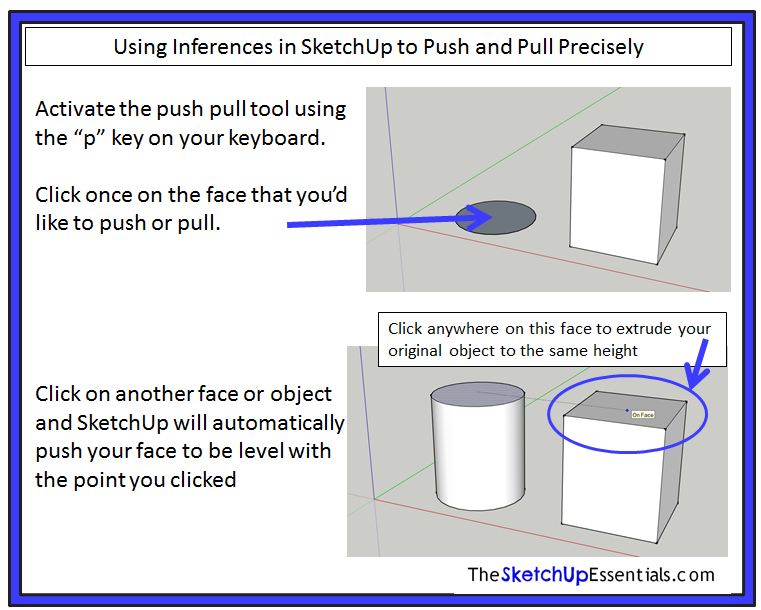
Note that this tool can be used with the SketchUp inferences engine, meaning once you click on the face you want to push and pull, you can click anywhere on the plane that you want to push or pull to, and SketchUp will automatically move your face to that plane.
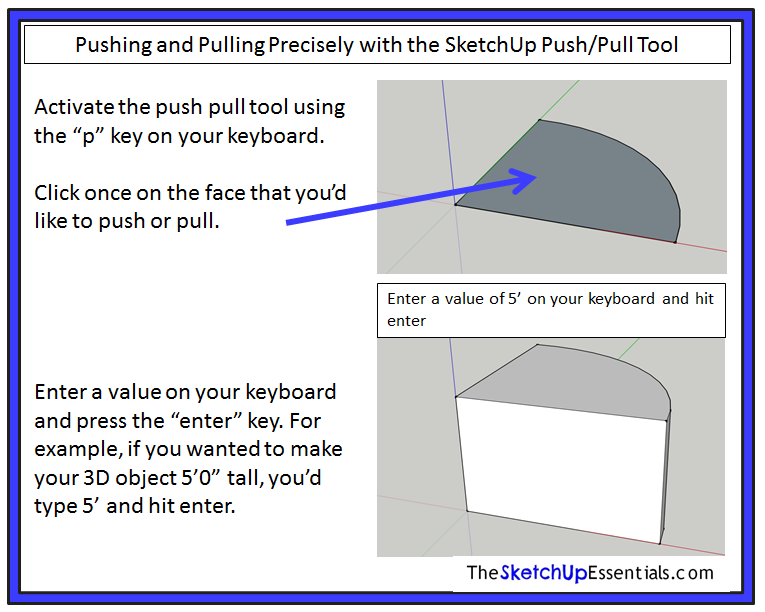
In addition, you can also use your keyboard to extrude your object to a height that you choose. To do this, activate the push pull tool using the “p” key on your keyboard. Click once on the face that you’d like to push or pull. Enter a value of 5’ with your keyboard, then press the enter key. This will give your object a height of 5’0”H.
One of the things that a lot of people use SketchUp for is drawing floor plans (plans that are viewed from the top down that show how a building is laid out). Now you could go through and just draw your building with the line tools by modeling every single line, but this can get pretty time consuming. Instead, most people draw the outline of their floor area, then use the offset tool to create their walls.
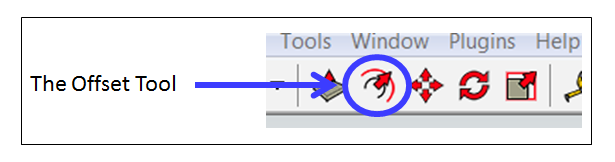
The offset tool is located on the getting started toolbar at the top of your screen. It looks like a pair of curved lines, one black and one red, with a red arrow running across them.
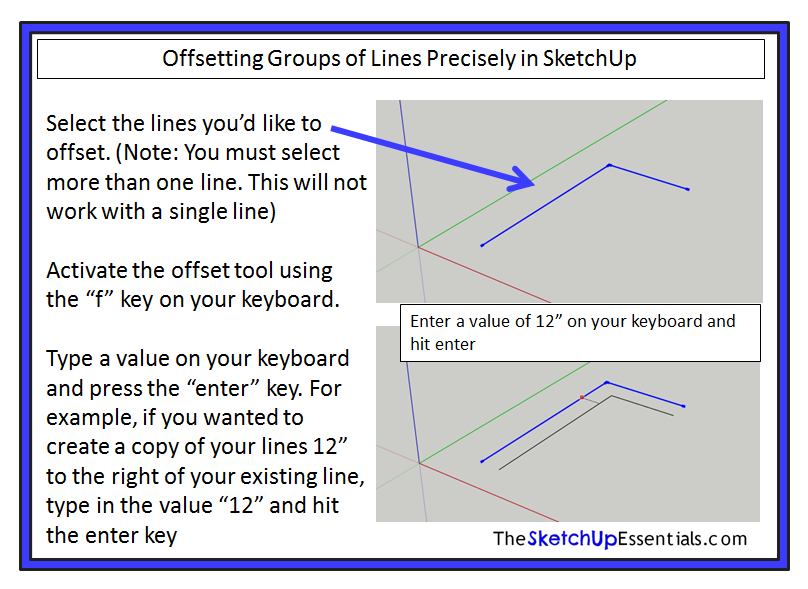
This tool is used to create copies of lines and objects at a uniform distance from the originals. It can be used to create copies of both lines and faces. When creating copies of lines, you must have two or more lines selected. It will not allow you to make a copy of a single line.
So if I have a pair of lines like the ones shown in the image below, and I want to offset them 12” to the right of where they are now, I’d select both lines, activate the offset tool using the “f” key, then enter a value of 12” on my keyboard and press the enter key.
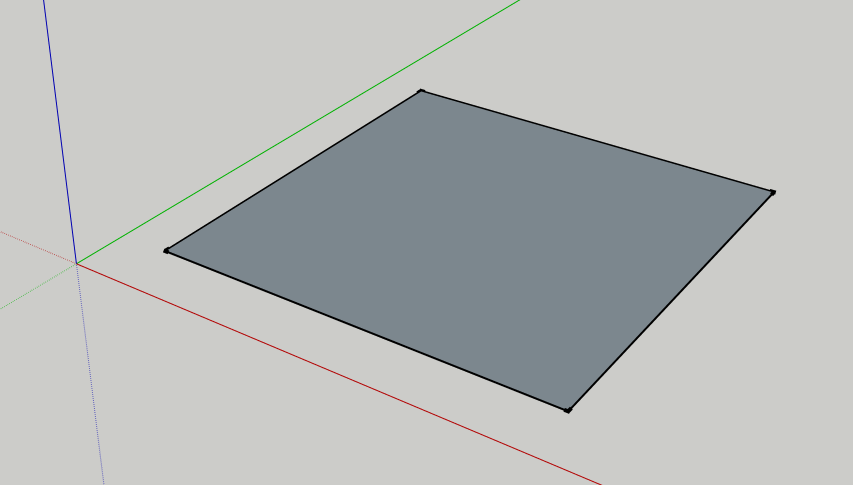
When using SketchUp, you will occasionally use the offset tool to create copies of lines. However, far more often, you will use the offset tool to create copies of faces. When working with lines, you must have multiple lines selected for the offset tool to work. However, when working with faces, all you have to have selected is a single face. For example, let’s say you have a rectangle like the one below, and you’d like to create a new rectangle inside of it 8” from your existing perimeter.
What you would do is click once on your face to select it, then activate the offset tool using the “f” key on your keyboard. Place your mouse cursor in your model in the direction you’d like to offset your rectangle. For example, if you wanted to create a rectangle inside your existing rectangle, place your cursor inside the box. If you want to create a larger rectangle outside of your box, place your mouse cursor outside your box. Type in a value of 8” and press the enter key. This will create a uniform line inside your existing rectangle at exactly 8” from your existing perimeter.

One of the most important uses of the offset tool (in conjunction with the push/pull tool) is creating 3D floor plans. A lot of the time, when drawing a floor plan, you’ll already know the outside dimensions of your walls. You’ll know what the perimeter of your building is, you’ll know what the thickness of your perimeter walls should be, and you’ll want a quick, easy way to create your walls without having to draw them individually. This is where the offset tool comes into play.
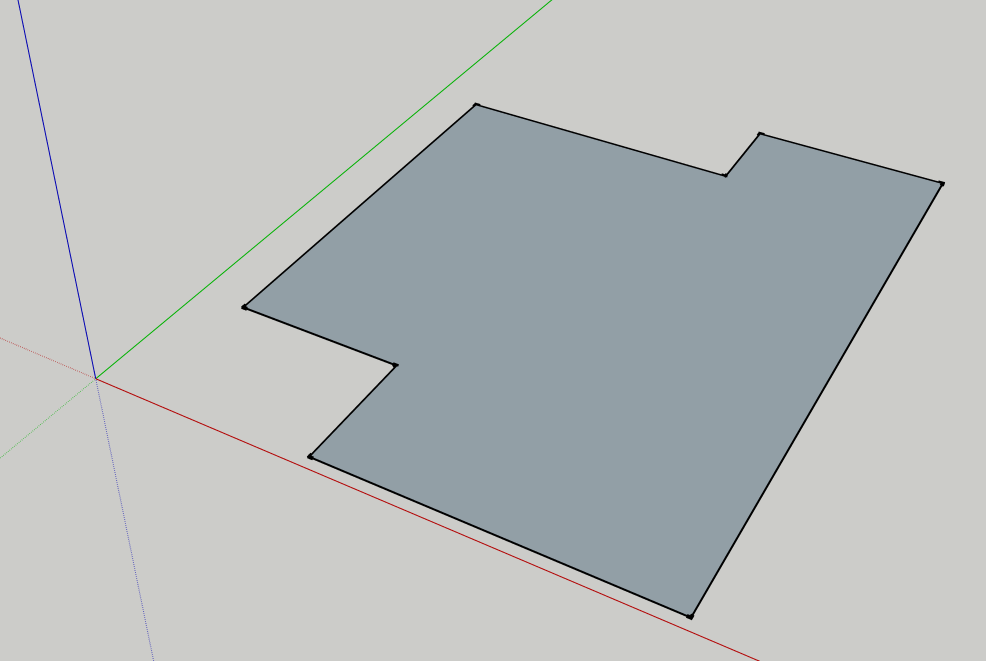
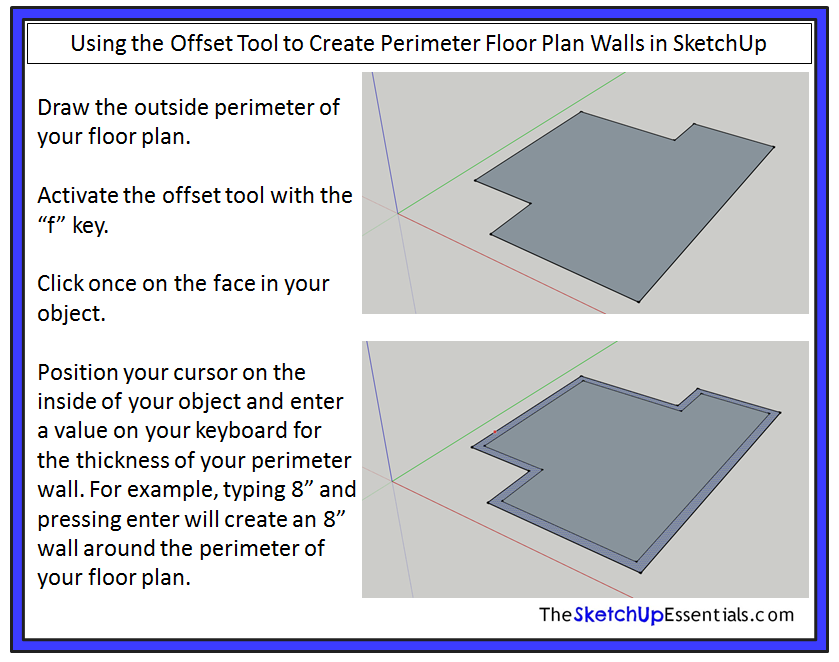
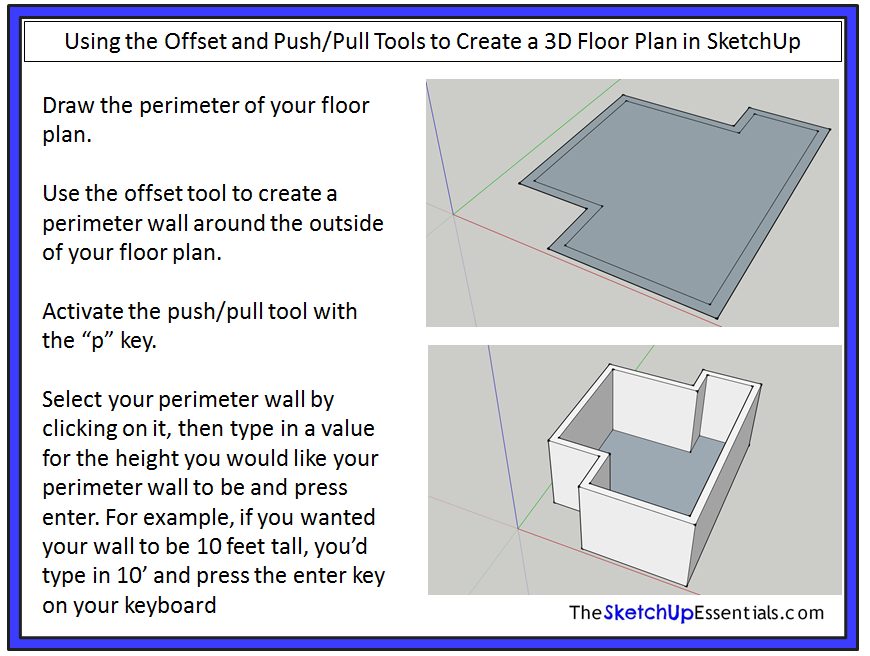
Let’s say you have a room like the one shown in the image below. It has kind of a funky shape, and it would be time consuming to go through and draw all the perimeter walls individually.
Instead, to save time, just use the offset tool to create your perimeter wall. Type “f” on your keyboard to activate the offset tool. Select your face by clicking on it once, and place your mouse cursor inside your floor plan’s face. Now type a value of 8” on your keyboard. This will create an 8” perimeter wall all the way around the inside of your floor plan.
Now that you have your exterior perimeter wall drawn, you can use the push/pull tool to extrude your walls to the height that you would like them to be so that you have your floor plan in 3D.
Activate the push/pull tool using the “p” key on your keyboard. Select the 8″ perimeter wall you just created in the last step. Now, type in a value for your height (in this case I have chosen 10’0”) and hit the enter key. SketchUp will extrude your perimeter wall to a height of 10’ around your entire floor plan. You now have your floor plan in 3D.
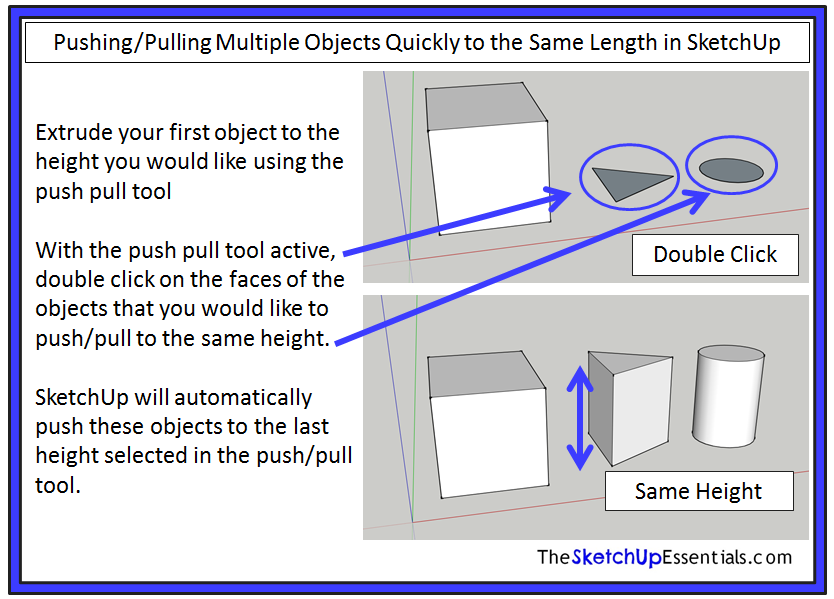
Sometimes you’ll be working with objects in SketchUp and you’ll want to push/pull several different objects to the same length quickly. Once you push or pull an object once, all you have to do is double click on another object to quickly extrude it to your original length. For example, if I extrude the box shown below to a height of 6’0”, all I have to do is double click on the triangle and SketchUp will extrude it to a height of 6’0” as well.
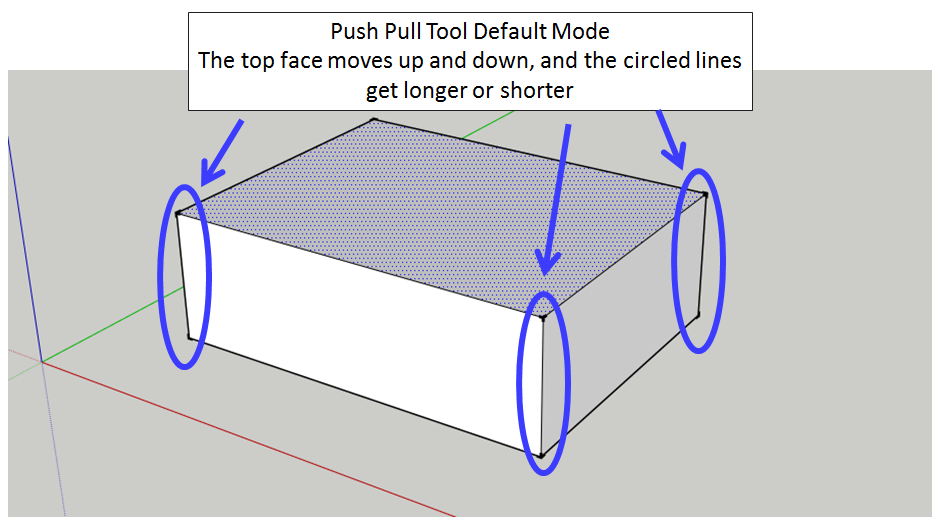
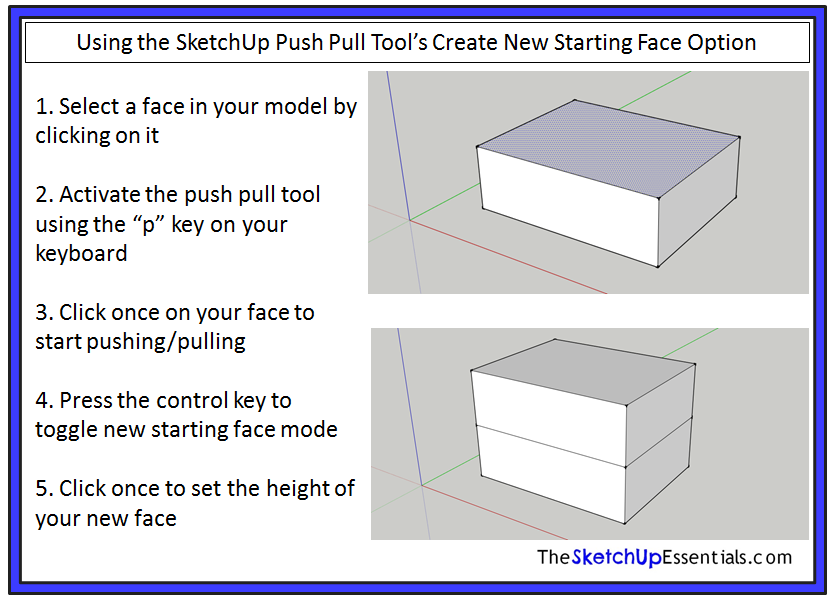
The last thing I want to talk about is the “Create new starting face” modifier. In its default mode, SketchUp pushes and pulls an object by moving an existing face and lengthening or shortening the lines attached to the face.
What if you want to create a copy of this face and move that up and down while leaving your existing face where it is? You can do this using the “Create new starting face” option. To activate this option, select your face, activate the push pull tool using the “p” key on your keyboard, click once on your object, and press the control key. This will toggle create new starting face mode. You’ll notice that now, your existing top face stays put, and SketchUp creates a new face that it extends up above your existing face.
As you can see, the Push Pull tool is a great tool for quickly creating 3D geometry and will become an essential part of your workflow if you model in 3D. Are there any unique ways that you use the push/pull tool? Let me know in the comments below!
_________________________________________________________________________________________________________________
About Justin Geis
Hi, I'm Justin Geis, and I'm the founder of The SketchUp Essentials. I started using SketchUp as part of my work as a general contractor in 2008. I quickly realized the power of the software and started using it for personal projects. I started The SketchUp Essentials as a place to share easy to follow SketchUp tutorials and tips to help everyone harness the power of 3D Modeling in their lives. When not working with SketchUp, I enjoy playing soccer and spending time with my wife and our two dogs.