
Basics of the Navigation and View Tools in SketchUp
In my previous SketchUp tutorials, I’ve talked a little bit about navigation and moving around in your models. However, I haven’t had a chance yet to get very in depth with these tools. This tutorial is designed to help you maximize your efficiency when working with the navigation and view tools in SketchUp. This tutorial will focus primarily on the view tools included in the getting started toolbar in SketchUp. A future tutorial will focus on the more advanced view and camera tools.
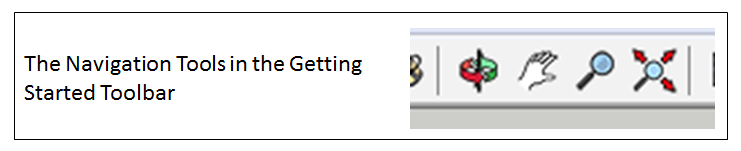
Let’s go ahead and start off by taking a look at the navigation tools that are included in the getting started toolbar in SketchUp. These tools can be found at the top of your screen.
Using the SketchUp Orbit Tool
The first tool on the left is the tool that you’ll probably use the most when moving around in your models. It’s called the orbit tool. You can use the orbit tool to move the camera around your model. There are several different ways you can activate the orbit tool. You can click once on the orbit tool icon in your toolbar, then left click and drag on your screen to move around. You can activate the tool using the “o” key on your keyboard, then click and drag on your screen to move around. Finally, if your mouse has a scroll wheel, you can click and hold down the scroll wheel while moving your mouse to orbit around your model (this is how I most often use the orbit tool).

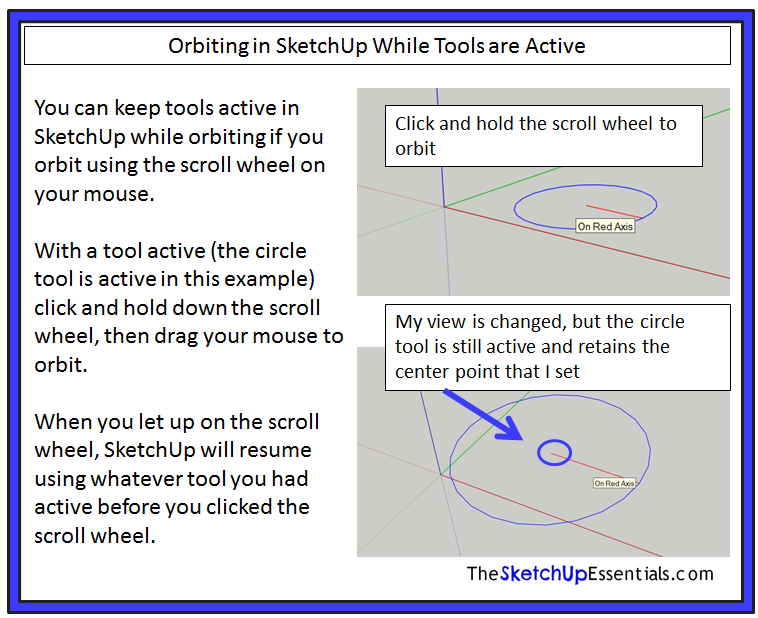
The nice thing about this third option (clicking your scroll wheel) is that it keeps whatever tool you were using at the time active. This means that if you were drawing a line and you’d set your first point, then you click and hold your scroll wheel to orbit around in your model, as soon as you let up on the scroll wheel button, SketchUp would resume using the line tool while keeping the first point that you set.
Using the SketchUp Pan Tool
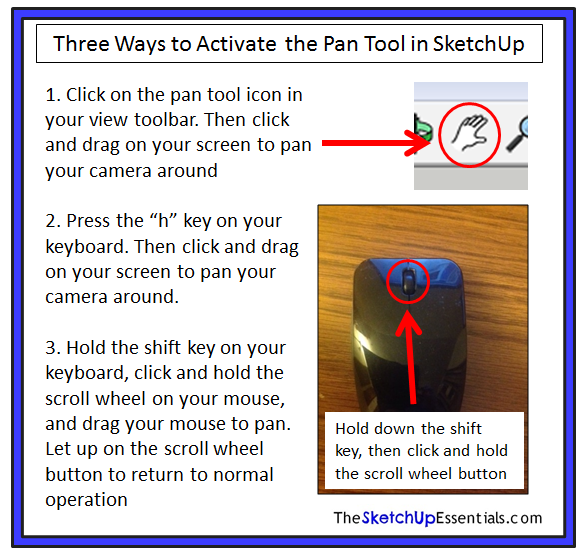
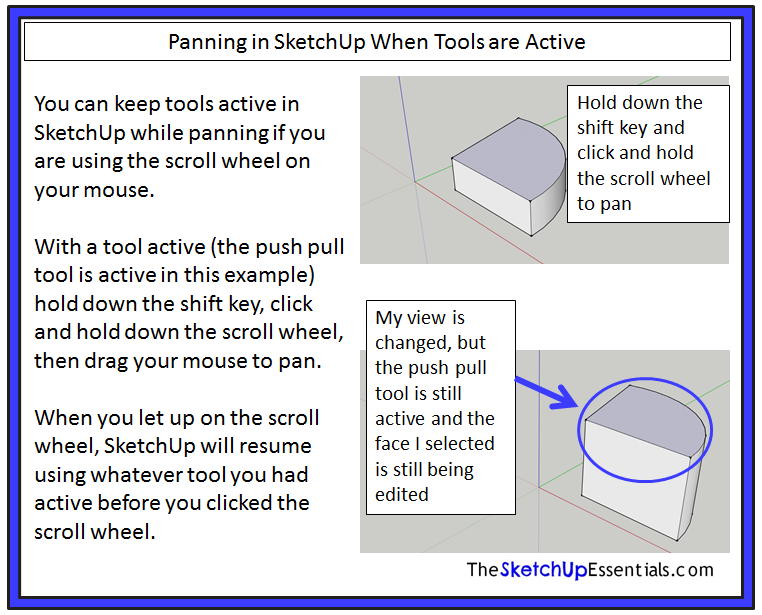
The next tool on the view toolbar that I want to talk about is the pan tool. This tool is used to move your camera viewpoint vertically and horizontally. There are 3 ways that you can activate the pan tool. The first is by clicking on the pan tool icon in your view toolbar, then left clicking and dragging on your screen. It’s the icon that looks like a little white hand. The second way to activate this tool is by using the keyboard shortcut “h,” then left clicking and dragging around on your screen. The third (and in my opinion, the best) way to activate the pan tool is by holding the shift key on your keyboard and clicking and holding your mouse wheel.
As with the orbit tool, if you use the scroll wheel to activate the pan tool, then whatever tool you had active when you started to pan will remain active when you stop panning. This allows you to adjust your camera view without losing your progress if you were working with a tool.
Zooming in and out in SketchUp
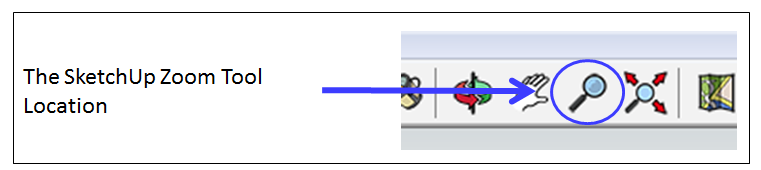
Now that we’ve talked about using the orbit and pan tools, let’s talk a little bit about zooming in and out. SketchUp provides several tools that you can use to zoom in and out on your models. The first is the zoom tool. It’s the icon that looks like a magnifying glass on the view toolbar.
You can also activate the zoom tool any time with the keyboard shortcut “z.” Once you have the zoom tool active, simply click in your model and drag your mouse up to zoom in or down to zoom out.
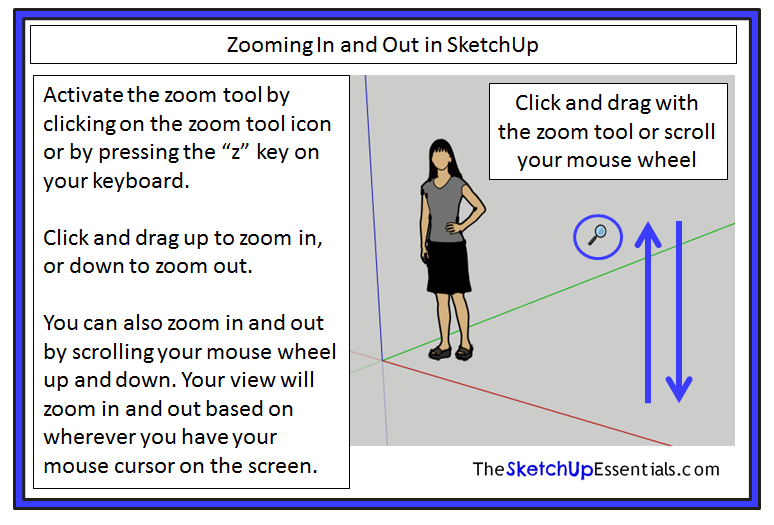
There is a much easier way to zoom in and out in SketchUp, however. Using the scroll wheel on your mouse, you can zoom in and out on wherever your cursor is located simply by rolling your scroll wheel up or down.
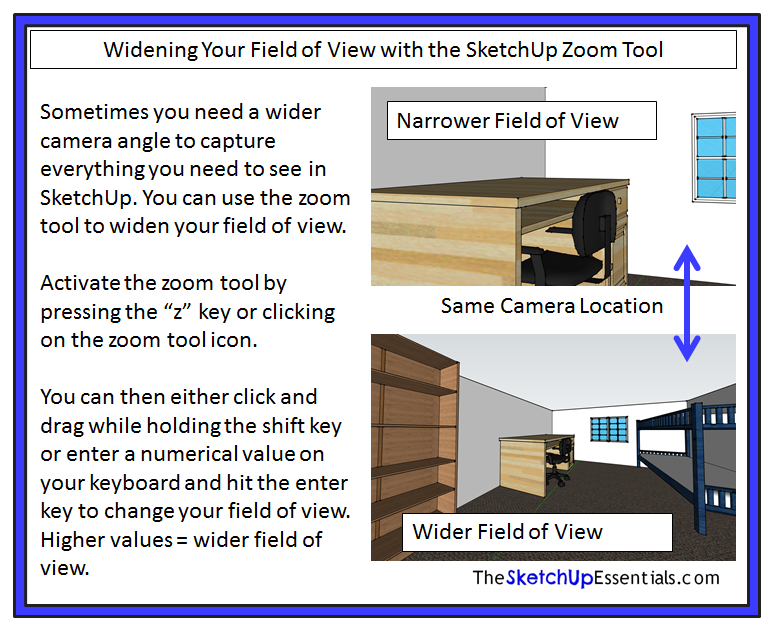
One of the other features I want to talk about with the SketchUp zoom tool is the ability to change your field of view. Field of view is basically the amount of your model you can see with your camera. A higher field of view allows you to see more of your model. However, if your field of view gets too high, you risk creating a “fisheye” type effect that distorts your model.
If you look in the lower right corner at your measurements bar when you have the zoom tool active, you’ll see that it shows the label “Field of View,” then a numerical value in degrees.

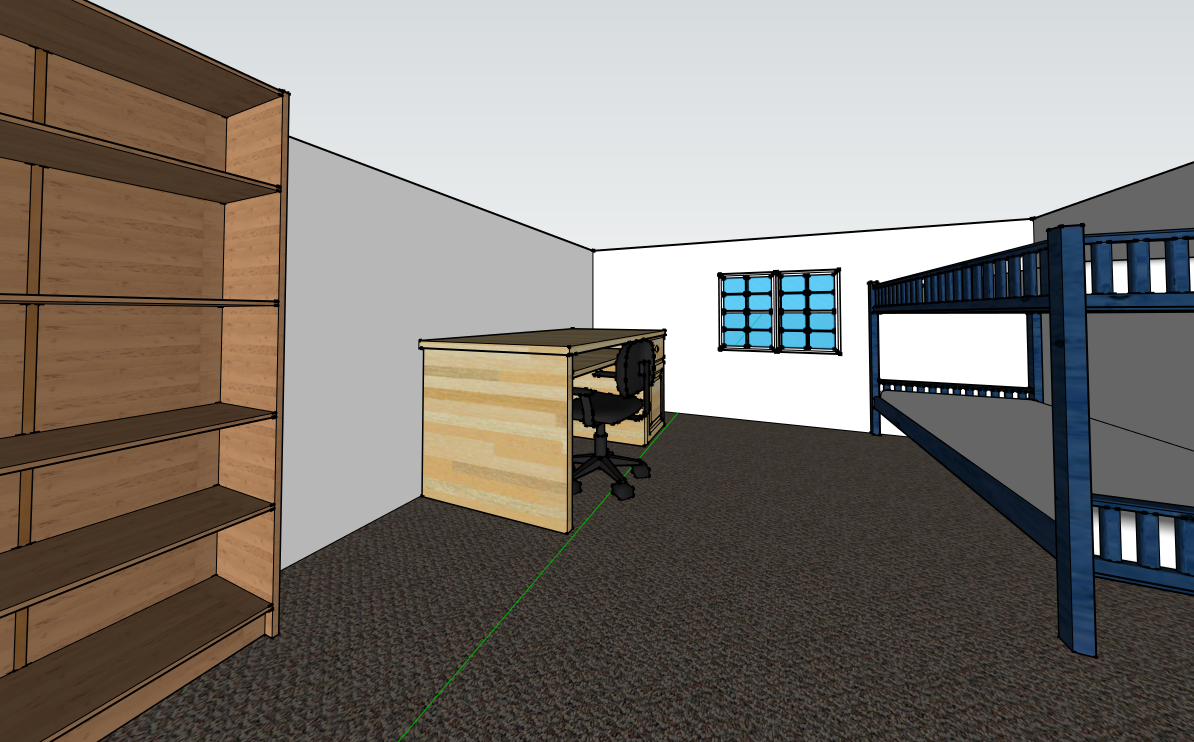
SketchUp defaults to a value of 35 degrees, which works pretty well when viewing the outside of buildings and smaller objects. However, this doesn’t always work so well when working with the interiors of rooms and situations like that. For example, this is a model I made of the room that I work in in my house.
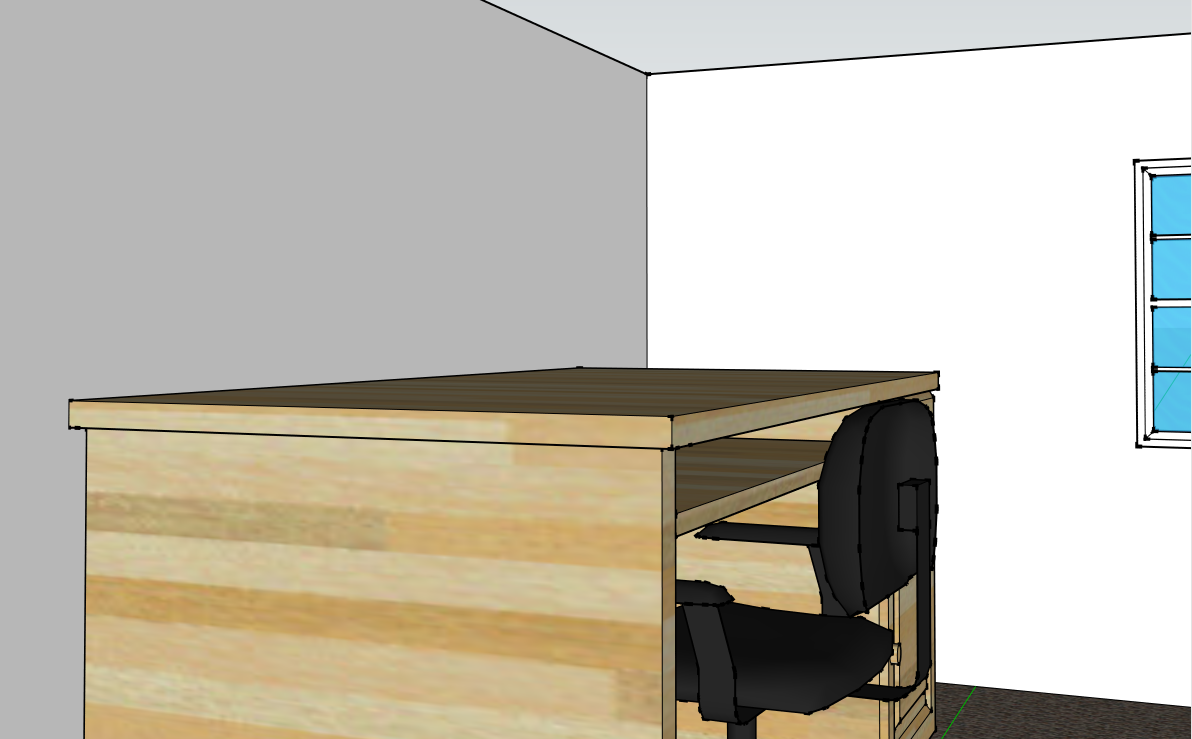
As you can see, because of the narrow field of view of the camera, I can’t actually see very much of this room. What I’m going to do is activate the zoom tool, and type in a value of 100 and hit the enter key.
As you can see, this significantly improves the amount of the model that I can see with my camera.
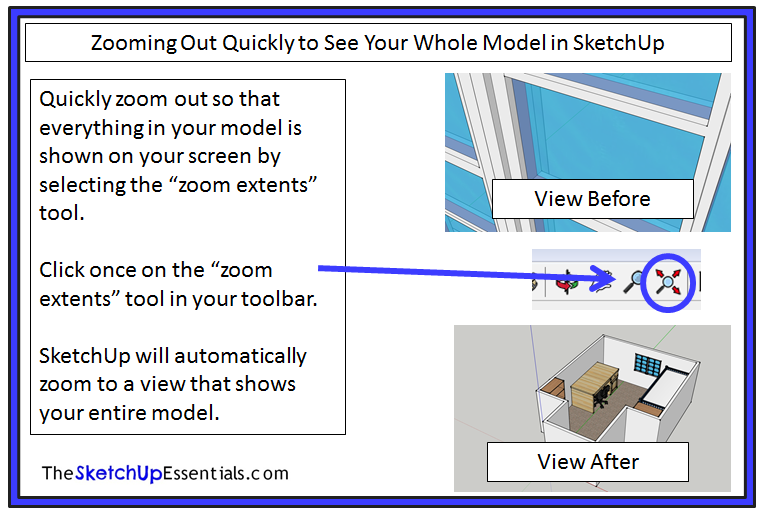
Sometimes when you’re working in a model you just want to quickly zoom out so you can see everything in your model. SketchUp has a view tool that does this called “zoom extents.” This tool does exactly what it sounds like – it zooms your view out so that you can see everything in your model. For example, using my office model again – let’s say that I’m zoomed in really close to my window because I’m editing it. All I have to do is press the zoom extents button on the zoom toolbar, and my view will automatically zoom out so my entire model is shown in my workspace.
In addition to the tools that are included for changing your camera view in the getting started toolbar, SketchUp also includes a group of built in views that can help you quickly navigate in your model. If you look up in your top toolbar in SketchUp, there should be a toolbar with a bunch of icons that look like little houses (see image below).
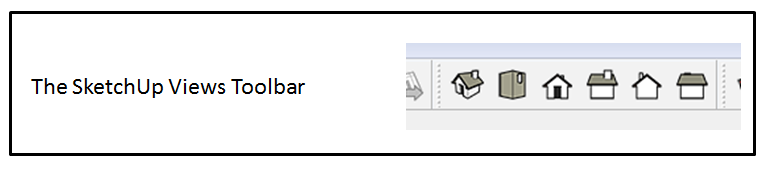
These are SketchUp’s built in views. From left to right, they include an isometric view, a top view, a front view, a right view, a back view, and a left view. These will automatically change your view to a preset angle. Please note, they do not automatically zoom your view out so you can view your whole model at these angles, so you’ll find yourself using them in conjunction with the zoom extents tool. Let’s go ahead and click on the icon that looks like the roof of the house viewed from the top down.
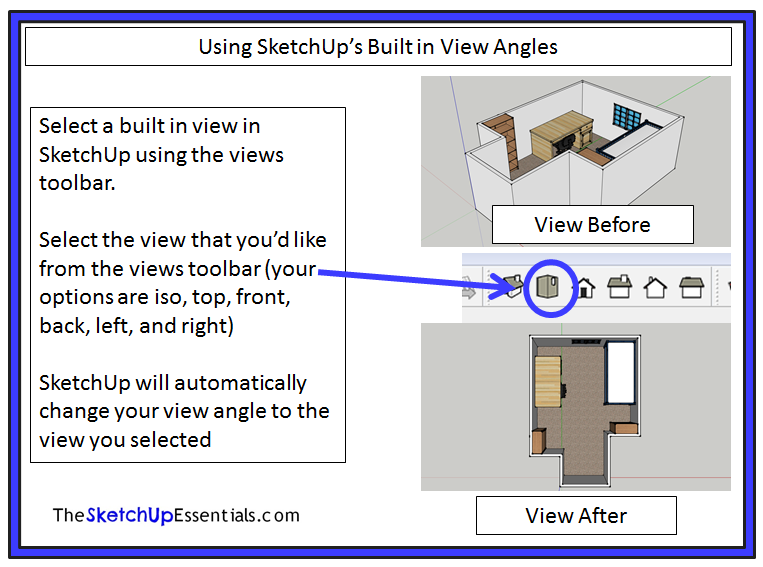
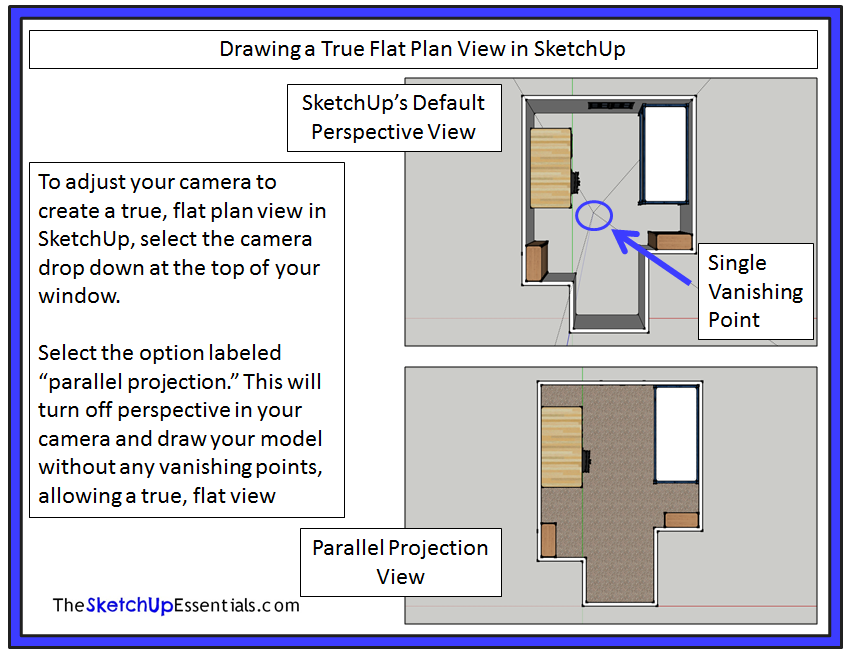
As you can see, SketchUp automatically changes your view angle to a top down view. One last note about using the built-in views in SketchUp – SketchUp defaults to drawing your views in perspective. This means that if you go to a view like the plan view shown above, your walls are all drawn like they’re moving towards a vanishing point. I’ve hidden my floor and drawn some guide lines on the image below to show you what I mean.
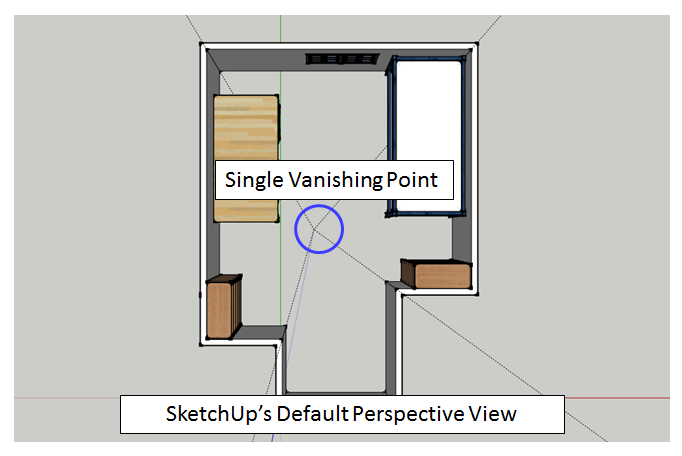
As you can see, all of your walls are drawn towards this single point, meaning we don’t have a true, flat “plan view.” To get a true plan view without the perspective, select the top down view from your preset views, then go to “camera” on your dropdowns, then select “parallel projection.” This will turn off perspective view and show your object in a true, flat plan view.
This tutorial covered most of the basics when it comes to navigation and view tools in SketchUp. There are also advanced navigation in tools that can be used to save your views and create animations that I will cover in a future tutorial.
_________________________________________________________________________________________________________________
About Justin Geis
Hi, I'm Justin Geis, and I'm the founder of The SketchUp Essentials. I started using SketchUp as part of my work as a general contractor in 2008. I quickly realized the power of the software and started using it for personal projects. I started The SketchUp Essentials as a place to share easy to follow SketchUp tutorials and tips to help everyone harness the power of 3D Modeling in their lives. When not working with SketchUp, I enjoy playing soccer and spending time with my wife and our two dogs.